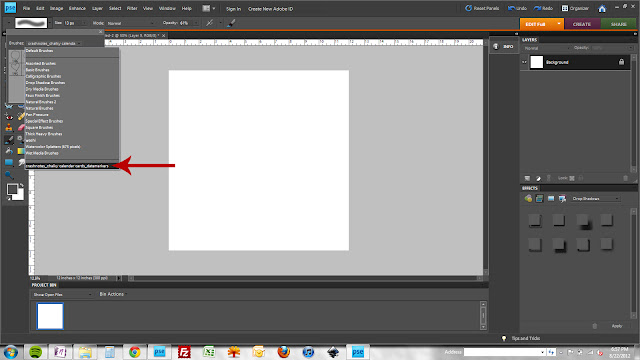
So you scrapbook. You aren't a digital scrapbooker per se, but there are so many rad digital kits out there that you're thinking maybe, just maybe, you'd like to learn a little something so you can print stuff out to use on your regular paper pages. Or add some pizzazz to a photo before you print it. There are a zillion places on the web that can help you out so I'm not going to claim to be the expert but maybe you landed here; maybe you want something quick and dirty; maybe you just like me and want to see what
I have to say on the subject.
When I first started scrapbooking digitally, I stayed away from brushes because they *seemed* difficult. They aren't though. Promise.
Typically, when you download a digital kit that includes brushes, the images come in two formats: an abr file and as png images. There is a reason for that! The abr file can be loaded into your editing program (either temporarily or permanently) and used like a digital stamp. If the abr file isn't compatible with your editing program, you can create and save your own brushes that will be compatible by using the png images.
So first off, do you know where your brush tools are located? Keep in mind that I'm using PSE so while Photoshop CS* will be similar, it's not going to be identical.
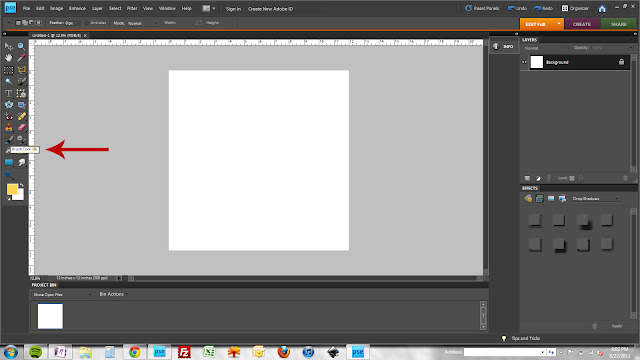 |
| here's your brush tool...the one that looks like a brush. click on it. or, just hit your "B" key! |
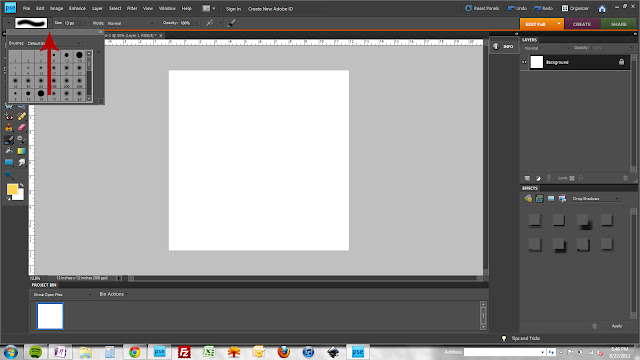 |
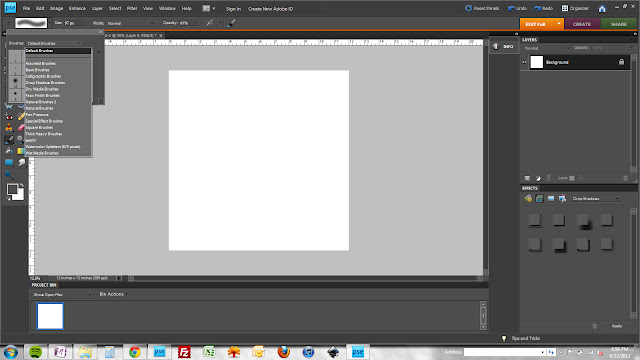
| once your brush tool is activated, you have a whole new toolbar up top! the first drop down is your brush selector. |
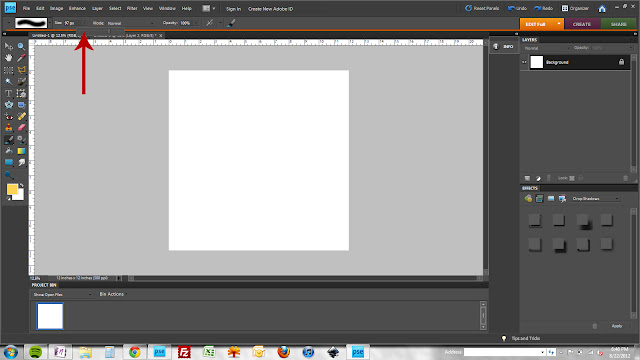 |
| your second drop down allows you to modify the size of the brush. one caveat here, you can upsize your brush slightly without distortion but if you go too much larger, you'll notice a significant loss of quality. downsizing, you're golden :) (and FYI, the largest you can go when you create or use a brush is 2500 x 2500 px) |
 |
| third drop down = mode. these options are just like your layer mode options in your layers palette. |
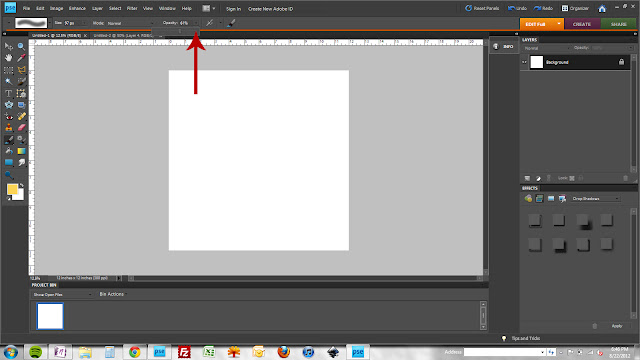 |
| finally, opacity. this is the opacity that your image will "stamp" at. |
Now, let's talk about permanently loading your abr file. This means the brush set is always available in your brushes menu (but can slow processing speed a bit.)
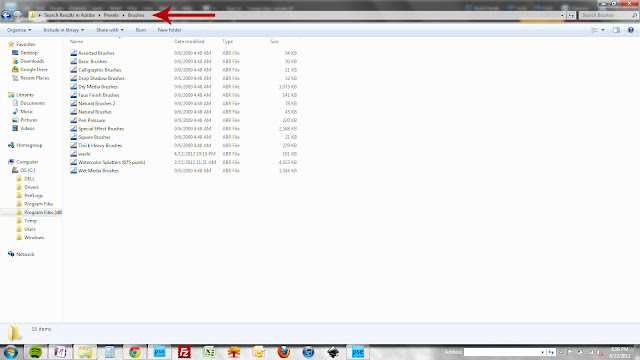 |
| first, you need to locate your presets folder. navigate to your program files > adobe > photoshop > presets > brushes folder. this is the folder where you will save your abr file. if you can't find it, just do a hard drive search for "presets" and it should turn up the correct location! |
 |
| once you save the abr file to your brushes folder, the brush set should show up in your default brush list (if elements is already open, you'll probably need to close and re-open it) |
Now, let's talk about temporarily loading brushes. This is the method I typically use (that is, when I use the abr file vs the png file)
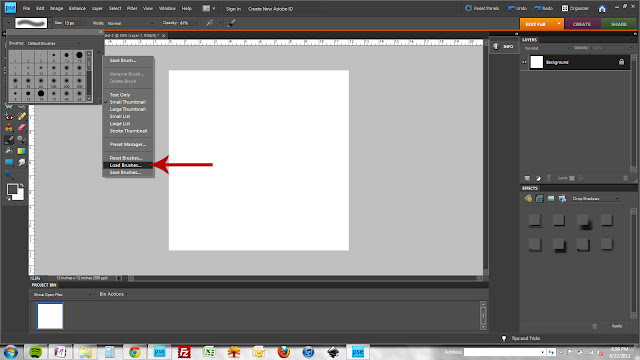 |
| with your brush tool active, click the little double arrow to the right of the brushes box and select load brushes |
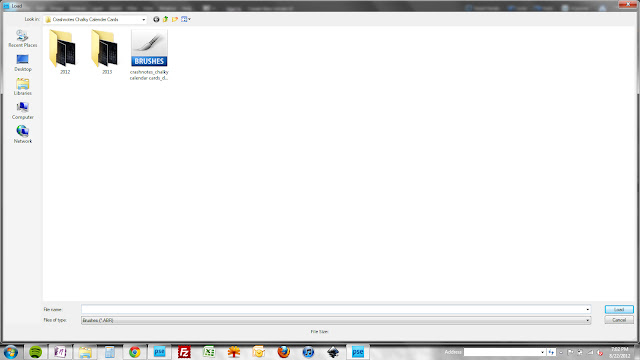 |
| find your abr file (it's easy - the one that says BRUSHES in giant letters ;) |
 |
| your brush set will switch to your loaded set of images |
 |
| if you click your brush selector drop down, you'll find your temporarily loaded set of brushes at the bottom of the list |
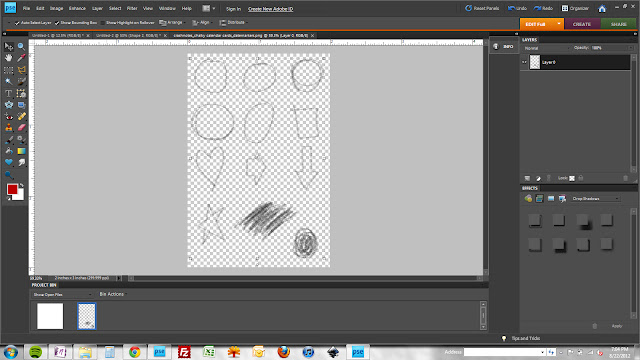
Finally, lets talk about using the png file to create and save your own brushes. Keep in mind that you can save your very own designs in this same manner! (you can use jpegs, pngs, whatever...as long as the selection area is within the 2500 x 2500 px max size)
 |
| open up your png file |
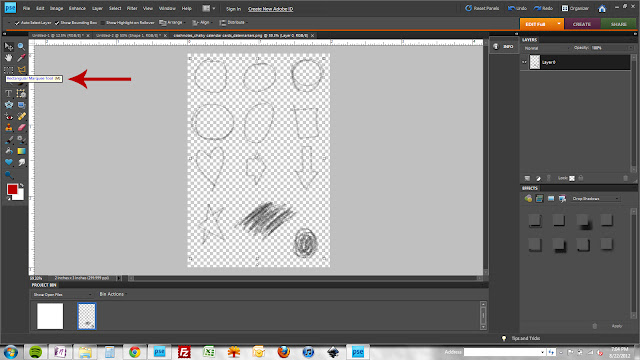 |
| choose your rectangular marquee tool (T) |
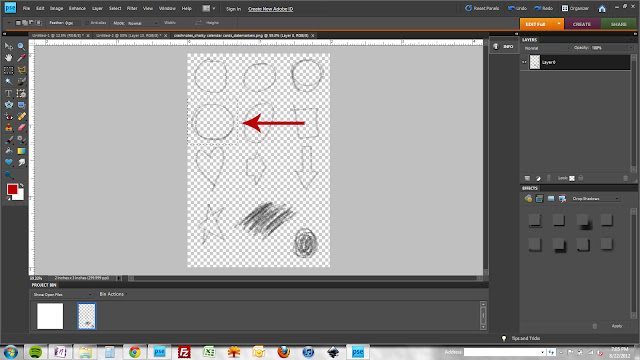 |
| draw a selection around the image you want to convert to a brush |
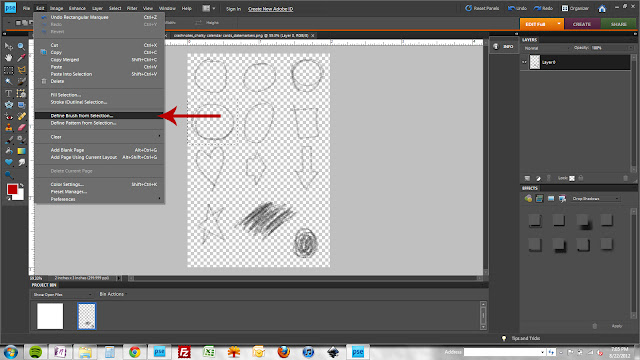 |
| select edit > define brush from selection |
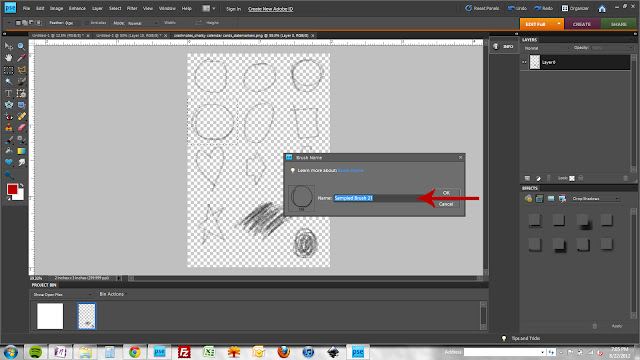 |
| get fancy and name your brush if you feel the need |
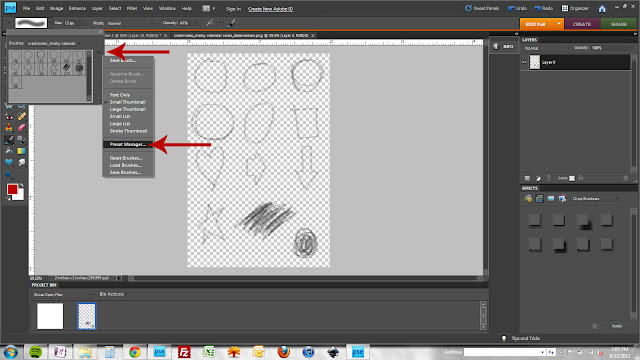 |
| repeat the previous select/define brush steps for each image. now we're gonna save them - weee! activate your brush tool (B,) click the little double arrow and then choose preset manager |
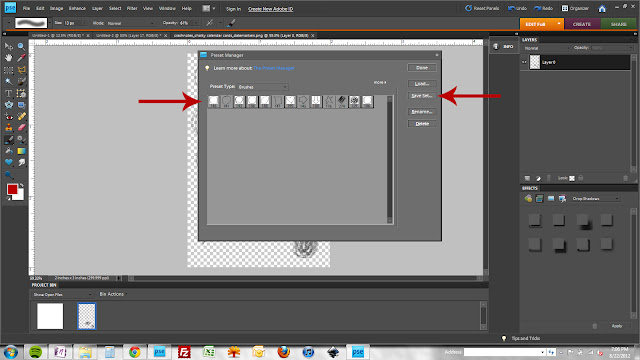 |
| now choose all of the images you want included in your brush (abr) file (TIP: hold your shift key and click on the first and last image to select all of the images...to only select some of the images, hold your ctrl key and click on each) got em? great! now click save set. |
This is all basics. If you want more info on changing your brush settings or other tips and tricks, do a quick search or let me know and I can share some more detailed tips and tricks.
And I know you want to try out your new skills, right? I create this quick brush set of arrows + numbers. Great for using on your pages or for creating journaling cards or photo overlays. Grab them
here! And show me how you use them (please!)


thanks for the freebie!!
ReplyDeleteyou totally inspired me to make a layout that i love using this digital file for a Silhouette cut file!! :)
Thanks for the tutorial!
ReplyDeleteThanks so much for the tute!
ReplyDelete