OK, for the tutorial:
 |
| open your chalkboard background and the image you'd like to use |
 |
| with your image file open, choose your rectangular marquee tool (M) |
 |
| draw a selection box around the portion of your image you'd like to use |
 |
| choose edit > define brush from selection |
 |
| name your image if you'd like, then click OK |
 |
| switch to your chalkboard image and create a new layer |
 |
| activate your brush tool (B) |
 |
| and choose the brush image you just created |
 |
| stamp your image (make sure you have the new layer selected...not your chalkboard background layer) |
 |
| add another new layer and while holding the control key, click on the thumbnail of the image layer |
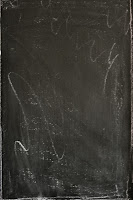
 If you'd like to use the chalkboard image I used, grab it by enlarging this image and right clicking to save. Enjoy!


totally digging that menu one - awesome!
ReplyDeleteI often try to replicate your PS tutorials in Pages just to see if I can do it ; ) Love this one!!
ReplyDeleteThanks Erica, great tutorial and thanks for the chalkboard :-)
ReplyDeleteum, you are brilliant.
ReplyDeletexoxo.
AWESOME
ReplyDelete