Three new [tiny] kits today...each just 99¢
I'll give all three kits to one of you! Just leave a comment, any comment, and I'll choose a winner Friday!
Now, for the tutorial. I wish I could figure out how to get better at screen capture videos but screenshots will have to suffice. Also, I'm all self taught so I'm adding a disclaimer that my methods may not be the best or most efficient but they get the job done!
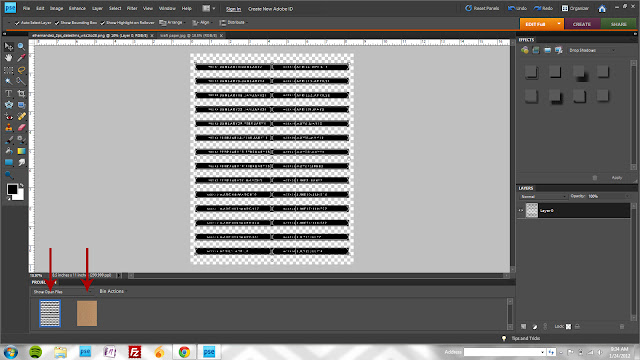
I designed those Date Slims because I wanted something that I could staple to the edge of my pl page protectors. Something that would add a little continuity and make it easy to find a specific week. I wanted *mine* to look like white ink on kraft paper though so I'm going to quickly show how I took the file from the Date Slims kit and modified to suit the look I was after. You can download my 8.5x11" kraft paper jpg
HERE. Just an FYI that this kit includes a blank label file as well so you can customize the dates if you're working a different format than Sunday - Monday.
 |
| Open the date slims file and the kraft paper file. |
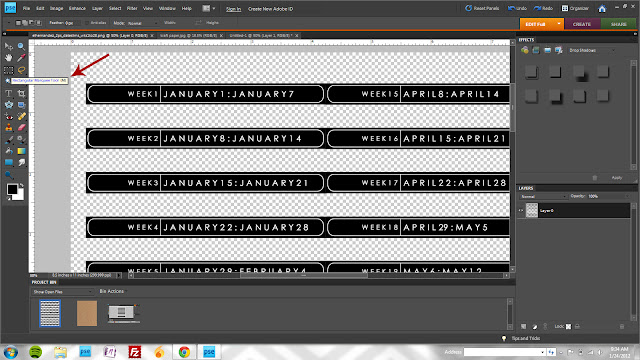 |
| Activate the Rectangular Marquee Tool (keyboard shortcut M) |
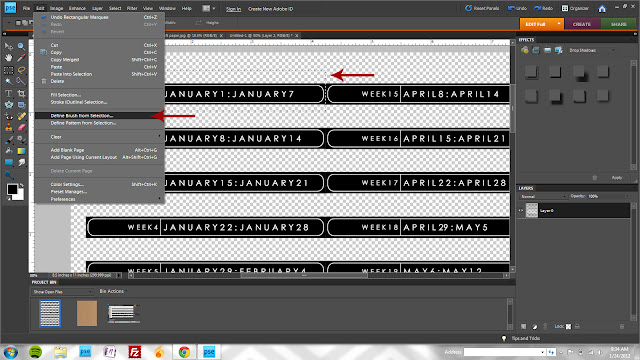 |
| Draw a rectangle selection around week 1 and then click Edit>Create Brush from Selection |
 |
| You can name your brush if you'd like but it's not necessary. If you're creating a lot of brushes at once (and especially if they'll look similar in a thumbnail like these week images will) then naming makes it much easier to identify the brush you want. |
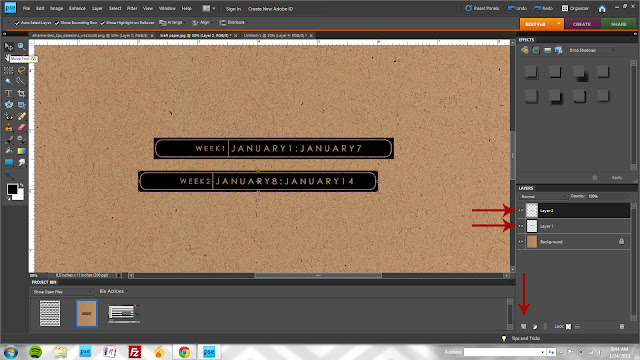 |
| Switch to your kraft paper file, create two new layers, and stamp week one and week two on separate layers. |
 |
| Rotate one of the layers 180° and position as shown. |
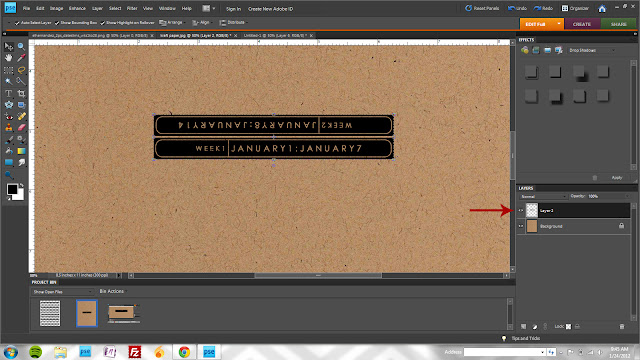 |
| Merge both layers together by selecting both (hold the shift key while clicking on both layers) and clicking ctrl+E. |
 |
| Select your kraft layer and while holding the ctrl key, click on the *thumbnail* image for the label layer (click on the actual picture - not the layer name) |
 |
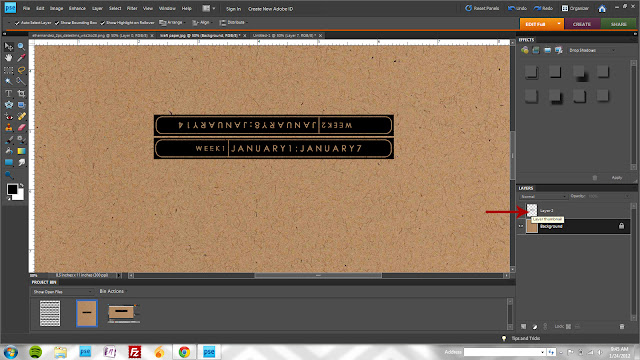
| At this point, you'll see the marching ants (animated dashed lines) that indicate you've made a selection. Click ctrl+J to create a copy of the date labels from the kraft paper. |
 |
| Here you can see the new layer that was created in the previous step. |
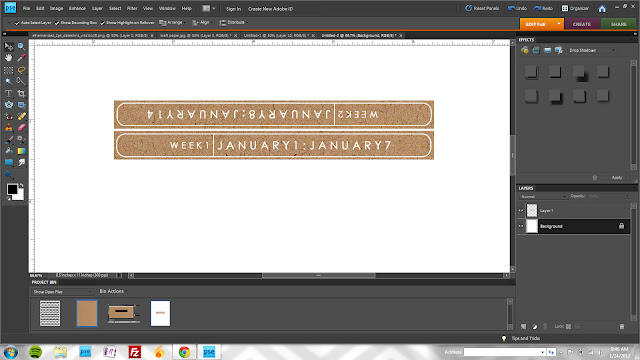 |
Drag your kraft layer to a new white canvas to print.
OK, so maybe not such a quick tutorial but I'm not a natural teacher and have a hard time figuring out the best way to demonstrate the steps. If you have questions, leave me a comment and I'll do my best to answer them!
|


i just bought the labels and the journal cards and your other two most recent journal card sets. love them all - this is a great tutorial something i didn't know how to do! thanks!
ReplyDeleteum, you are brilliant.
ReplyDeletexoxo.
oh, wow! cool!
ReplyDeletePick me!
ReplyDeleteI need these :)
you are on a roll girl - love everything you're cranking out!
ReplyDeleteand can't wait to catch a glimpse of your PL! :)
Love your PL posts and products, and this tutorial is great!
ReplyDeletelove this tutorial. you are so smart. :)
ReplyDeleteoohh i need these! i'm doing digi PL this year. i'm a digi noob, but i love it so far. and i love your stuff! thanks for the tutorial. :)
ReplyDelete