A couple of weeks ago, we hit the mini hill behind my dad's house for some low-key sledding. Mostly, I helped Izzy climb the hill and then came back down with her on the sled but for her first solo trip, Jake helped her up so I could take a few pictures. While they aren't great, I still love the progression they show and wanted to somehow reflect that movement in layout form without sacrificing the size of the photos. So, I created the layout as an animated gif to share online.
It's really not all that difficult so I thought I'd do a quick tutorial on how I accomplished it (as I'm sure there are other, more efficient ways of doing it.)
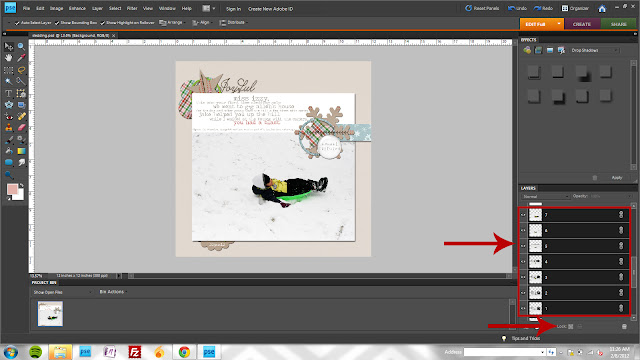 |
| 1. Create your layout as you normally would. I chose all of the photos I wanted included in the animation, numbered them in the order they would appear in the layout and locked them so that I could move them around as I designed the layout while keeping them in an identical position. |
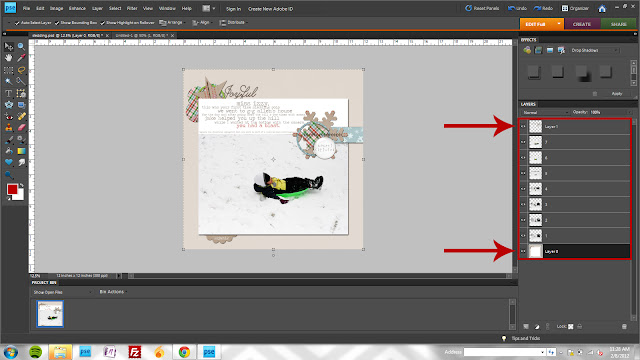 |
| 2. Once I was satisfied with the design, I merged all of the layers *above* the photo layers into one layer and all of the layers*below* the photo layers into another. So now, I have a total of 9 layers: 1 top layer, 7 photo layers and 1 bottom layer. (Of course you do all of this after you have saved your original, layered design! Do this on a copy or resave with a new name right away!) To merge multiple layers using keyboard shortcuts (I'm all about keyboard shortcuts,) select all of the layers above the photos (click the very top layer and then, while holding the shift key, click the last layer that appears just above the photos) and click ctrl + E. Repeat for all the layers below the photos. |
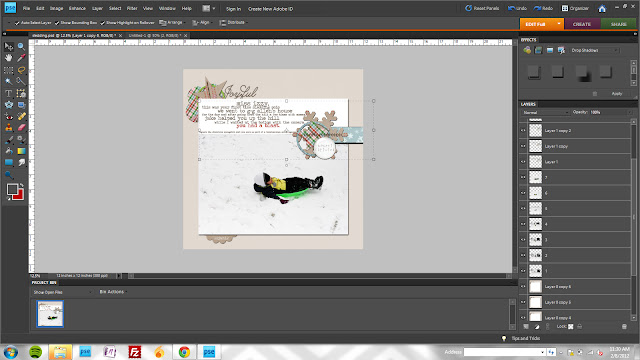 |
| 3. Next, you need to create duplicate copies of the background and top embellishment layers. You need enough for each photo so for me, I created 6 copies of each for a total of 7 layers above and below (21 layers in total.) ctrl + J is a fast method of creating duplicate layers. |
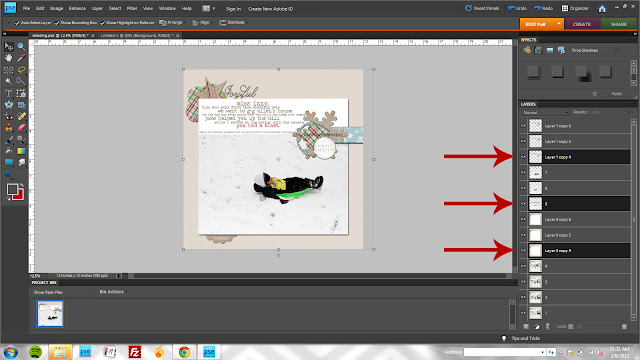 |
| 4. Now, you need to merge a top embellishment layer, a photo layer, and a bottom background layer for each of the 7 photos. Essentially, you are creating 7 identical layouts, each with a distinct photo. To select non-consecutive layers in the layers palette, hold the ctrl key (rather than the shift key you used in step 2.) Once you've selected the 3 layers, ctrl + E will merge them. Make sure the layers retain the numbers you assigned the photos previously. |
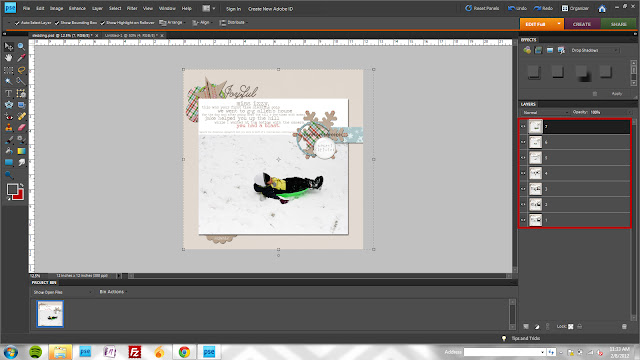 |
| 5. Once you're done, you'll have your 7 layout layers. They should appear in reverse order with the last photo appearing in the top of the layers palette. |
 |
| 6. Now, you'll resize your layout. A full size 3600 pixel image is too large to convert to an animated gif (and unnecessarily large for monitor display anyway.) To resize, click alt + ctrl + I (or menu Image>Resize>Image Size) I changed my resolution to 1000 px. |
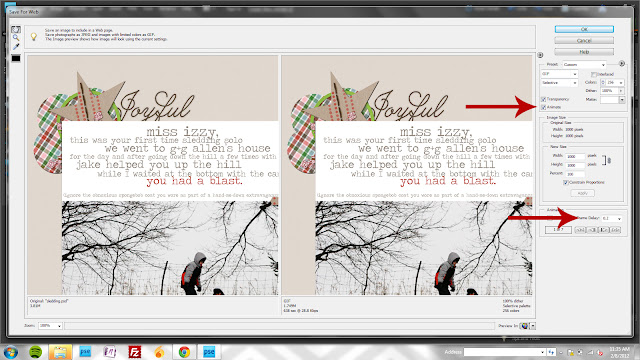 |
| 7. Finally, you'll save your layers as a gif. Choose File>Save for Web (or
alt + shift + ctrl + S.) Make sure the "animate" box is checked and adjust your frame delay as desired. For this layout, I left it at the default .2 seconds. To preview your animation before saving, click the "preview in" icon at the bottom of the pop up box. |
And obviously, this isn't something that can be captured once I print so for my album, I simply selected my favorite photo for use on the main page and then shrunk the rest for inclusion on a second, simple page.
I know my instructions could be better so if you have any questions on how I did it, just let me know!


oh my goodness, that is SOOOOO cool. you rock.
ReplyDeleteyou are the coolest scrapbooker evah.
ReplyDeletebut i've thought that since the beginning.
a.m.a.z.i.n.g.
That is about the coolest thing ever!
ReplyDeleteYou're so brilliant!
ReplyDeletethis is beyond awesome - WOW!
ReplyDelete