I promised an easy tutorial for using dingbat fonts to create files suitable for cutting and I assure you this IS easy. Don't let the excessive number of screenshots deter you - I just wanted to be thorough!
Let's get started. I use PSE for your reference.
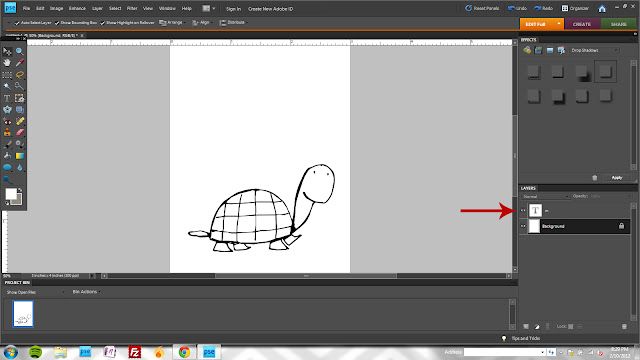 |
| 1. Start by choosing your font and image (this turtle is from DW Boys will be Boys - letter "m") Try to size it approximate to the size you'll be cutting and when it doubt, go bigger. Your quality will always be better downsizing rather than upsizing. |
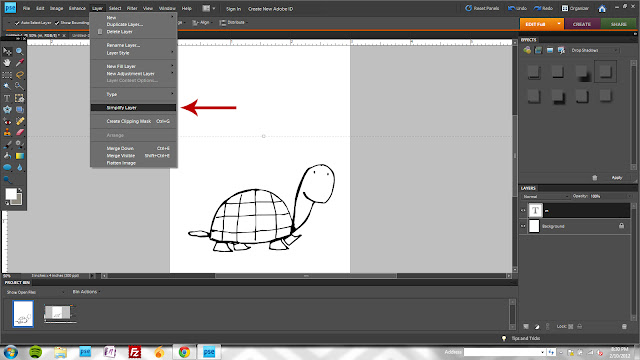 |
| 2. Next, "simplify" the layer (Layer>Simplify Layer OR right click on the layer in the layers palette and choose "simplify layer.") |
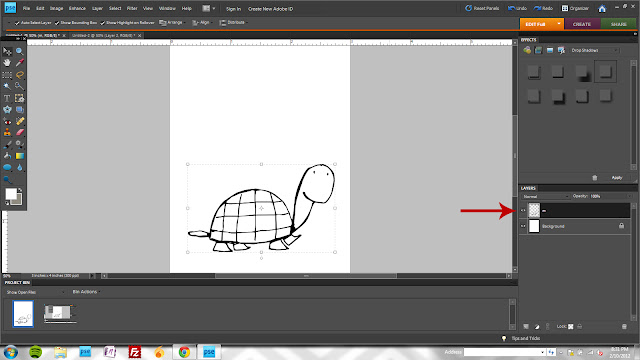 |
| 3. This shows how the layer thumbnail appears after simplifying. |
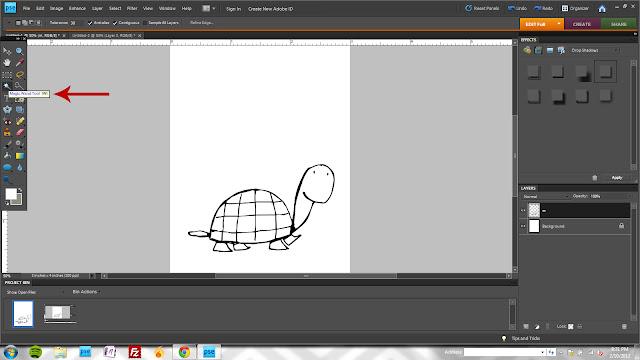 |
| 4. Choose your Magic Wand Tool (W) and click on your canvas anywhere *outside* of the image outline. NOTE: If there are any breaks in the outline, you'll need to close them. I'll show how to do this at the end of the post. |
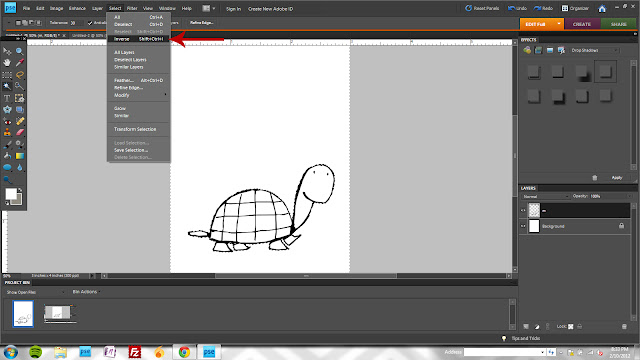 |
| 5. Click shift + ctrl + I (or Select>Inverse) to reverse your selection area. |
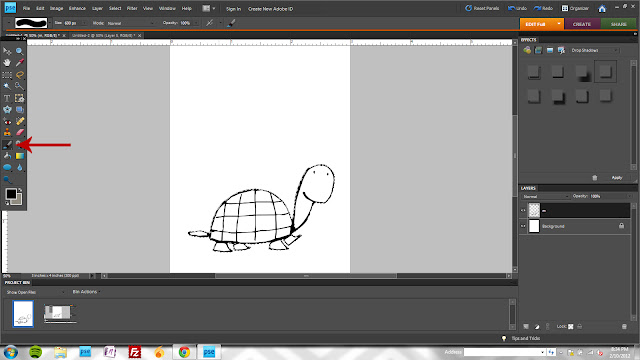 |
| 6. Activate your brush tool (B.) |
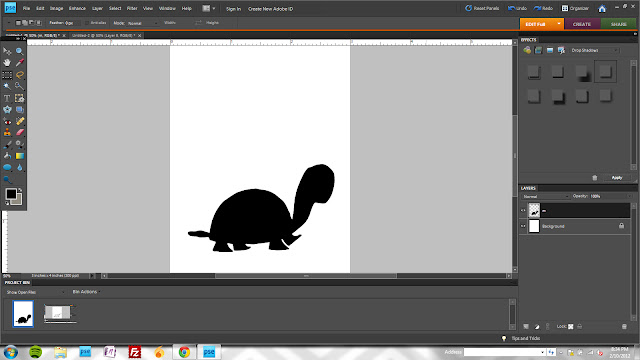 |
| 7. Make your brush HUGE and stroke over the selected area. |
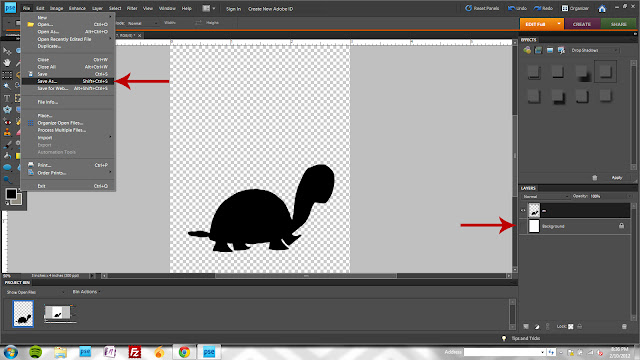 |
| 8. Hide your background layer (click the eye icon) and click File>Save As (shift + ctrl + S.) Save the image as a png file - this will allow you to open and trace in your Silhouette (or other? not familiar with other machines) software. |
Now that you have a basic understanding of creating your png file, I'll show you an easy way to add a bit more detail.
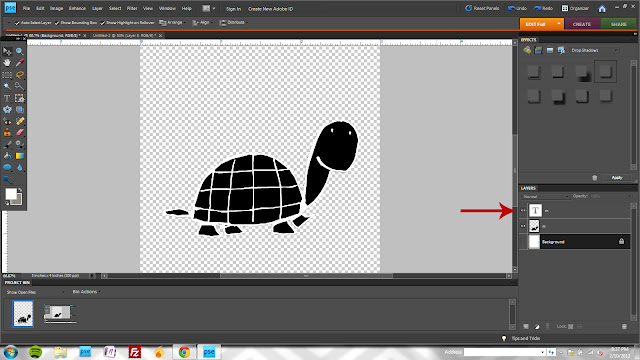 |
| 9. I layered a copy of the turtle image over the simplified, black layer. |
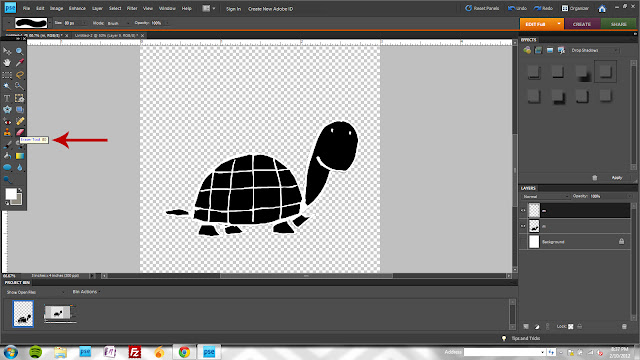 |
| 10. After simplifying the new layer, activate your eraser tool (E.) |
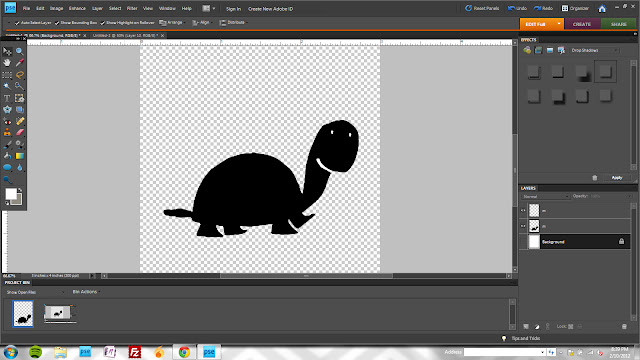 |
| 11. Next, I erased all of the image except for some basic detail that I thought would add to the final product (eyes and a mouth help, right?) |
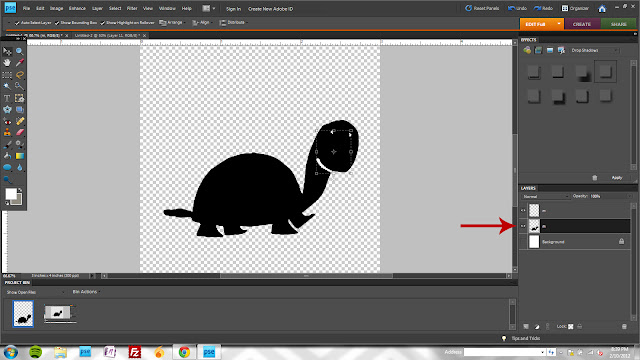 |
| 12. With the black layer selected, hold your ctrl key and click on the thumbnail for the top detail layer. This will create a selection area ("marching ants") for the eyes and mouth. |
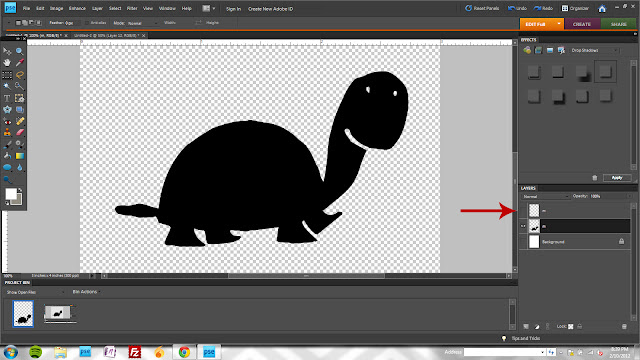 |
| 13. Hit the delete key to remove the detail from the black layer and hide the top layer by clicking the eye icon. Save as a png file as directed previously. |
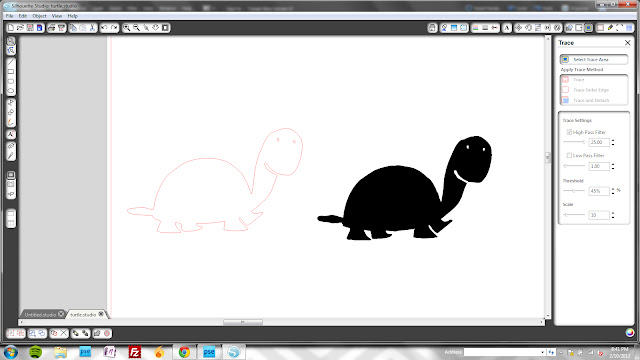 |
This screenshot shows the trace image in the Silhouette software (the turtle kind of turned brontosaurus in the process but you get the idea ;)
|
And finally, to show you how to close gaps in your outlines.
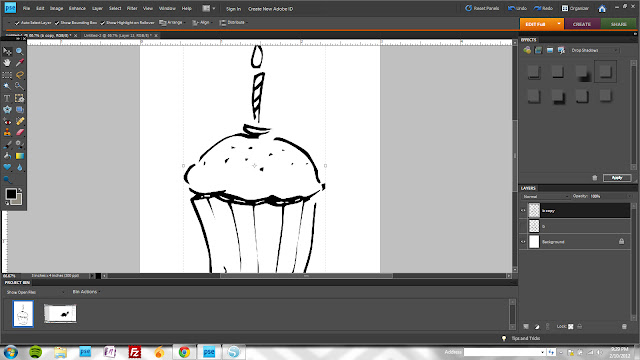 |
| Again, start with your dingbat ("b" from the DW Make A Wish font) and simplify. |
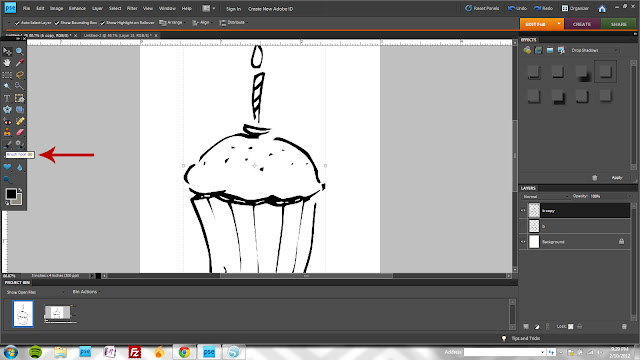 |
| Activate your brush tool (B) and change the brush size to something fairly small (I was around 8 or 9 pixels.) |
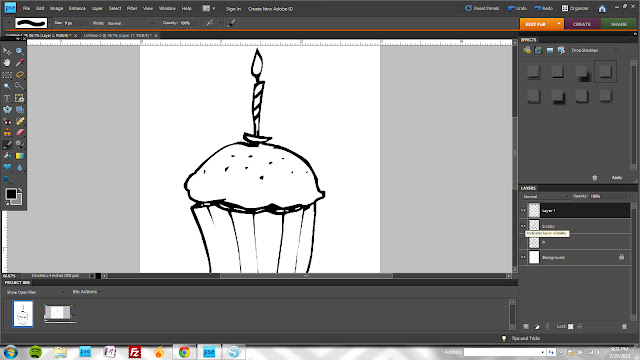 |
| Fill in all of the gaps in the outline. No need to be super precise about this. However, I would do this on a new layer for now (the new layer icon is the first icon located on the bottom of the layers palette.) |
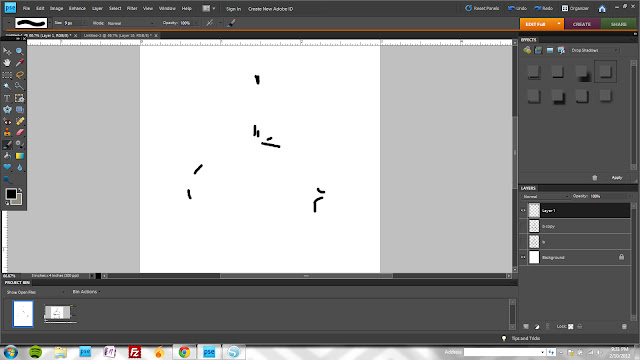 |
| This show just the new layer with the brush marks I created to close the gaps. |
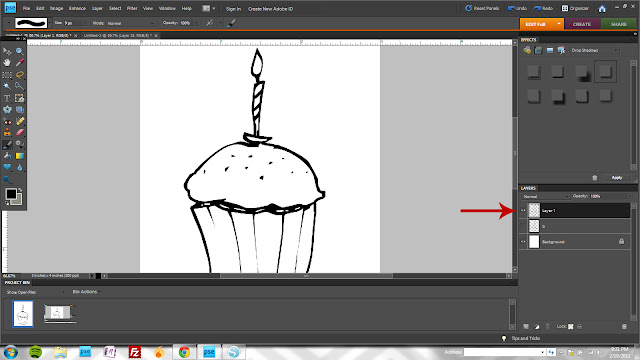 |
| Once you're satisfied that the gaps are filled, merge both the image layer and the brush layer (select both layers by holding the shift key and then click ctrl + E) |
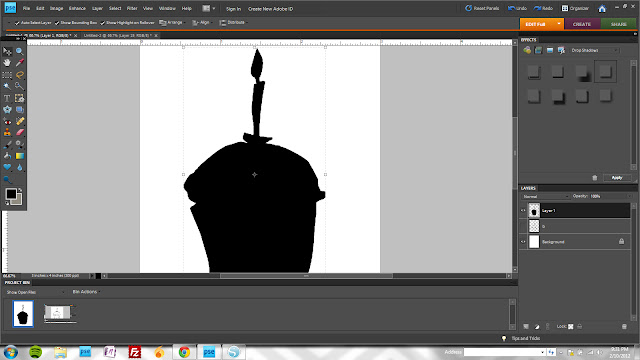 |
| After coloring the dingbat. |
 |
| And after adding a bit of detail back in. |
There are really SO many possibilities with dingbats. And the best way to learn how to do it is to simply play. If you have questions, leave them in the comments and I'll do my best to answer :)


Ahhh, you're brilliant. I've been wondering how to do this, but didn't have 1,287 hours to sit down and try to figure it out. ;p thank you for posting this! xo
ReplyDelete